Object Storage
The Object Store is an interface where users can upload data directly to our Ceph cluster for storage.
Please note that while Ceph is a reliable, replicated storage solution, we do not currently maintain any offsite backup of user data.
Please do not keep your only copy of critical data in our Object Store.
You can manage objects in the Object Store via the web interface, or by using the API to connect to the Rados Gateway service, which provides a Swift or S3 interface.
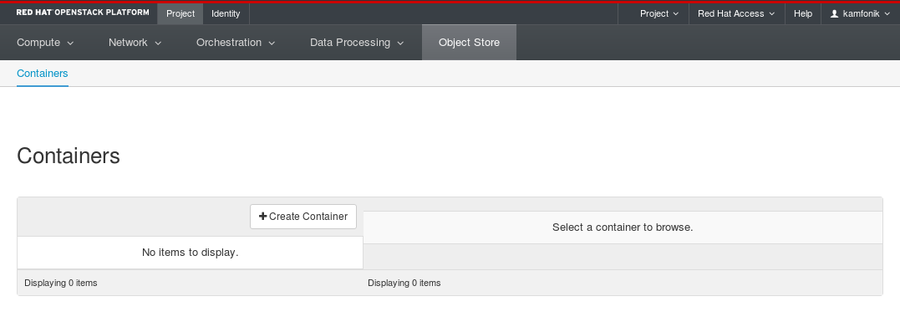
Web Interface
To get started, navigate to Project -> Object Store -> Containers.
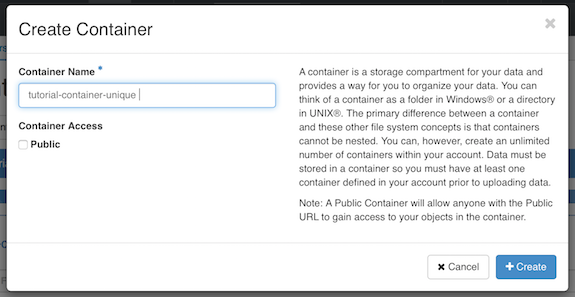
Create a Container
In order to store objects, you need at least one Container to put them in. Containers are essentially top-level directories. Other services use the terminology buckets.
Click Create Container. Give your container a name. The name needs to be unique, not just within your project but across all of our OpenStack installation.
If you get an error message after trying to create the container, try giving it a more unique name.
For now, leave the Container Access set to Private.
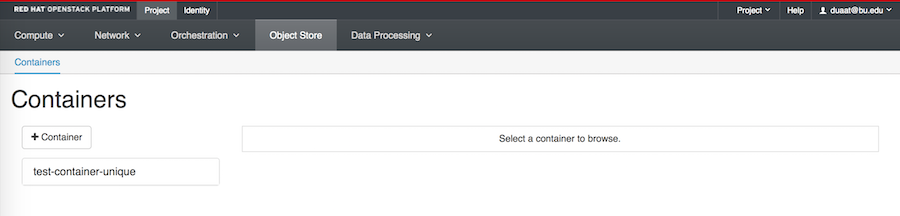
Your container now appears in the containers list.
Upload a File
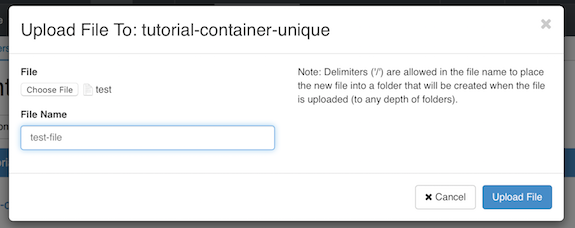
Click on the name of your container, and click the Upload File icon. Click Browse and select a file from your local machine to upload.
It can take a while to upload very large files, so if you’re just testing it out you may want to use a small text file or similar.
By default the File Name will be the same as the original file, but you can change it to another name. Click “Upload File”. Your file will appear inside the container.
Using Folders
Files stored by definition do not organize objects into folders, but you can use folders to keep your data organized.
On the backend, the folder name is actually just prefixed to the object name, but from the web interface (and most other clients) it works just like a folder.
To add a folder, click on the “+ folder” icon.
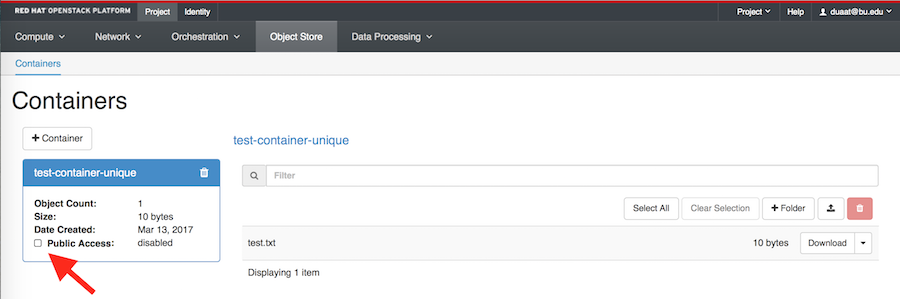
Make a container public
Making a container public allows you to send your collaborators a URL that gives access to the container’s contents.
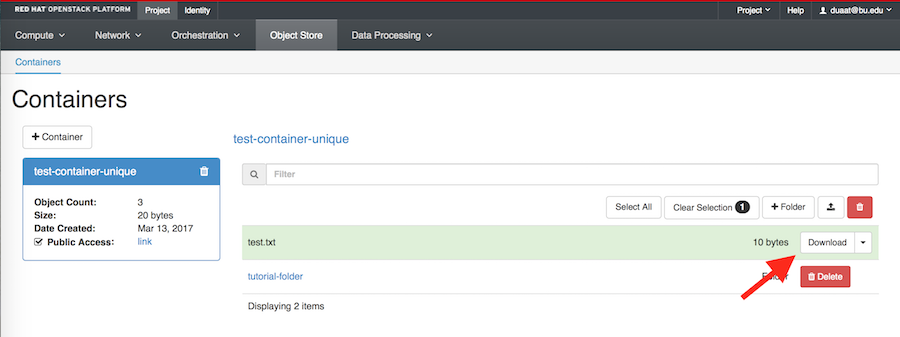
Click on your container’s name, then check the “Public Access” box. Note that “Public Access” changes from “disabled” to “link”.
Click “link” to see a list of object in the container. This is the URL of your container.
Note that anyone who obtains the URL will be able to access the container, so this is not recommended as a way to share sensitive data with collaborators.
In addition, everything inside a public container is public, so we recommend creating a separate container specifically for files that should be made public.
In this example, we have added a folder and a second object, to show how the directory structure appears in the container.
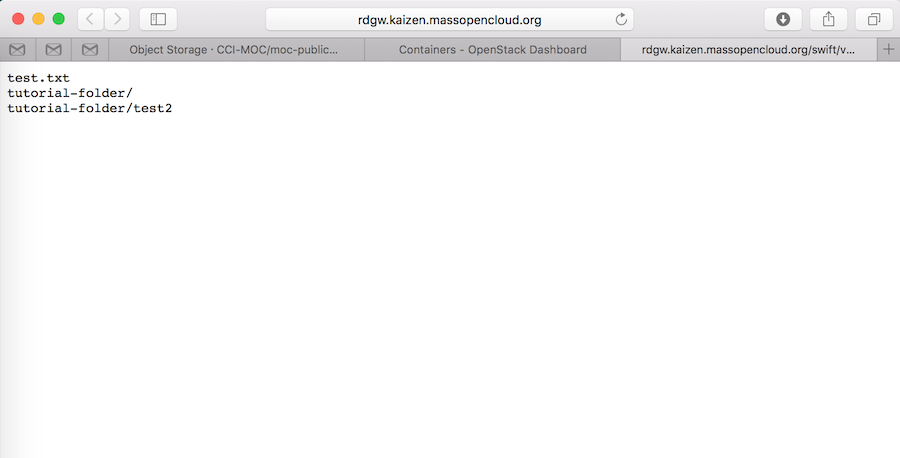
To download the file test.txt we would use the following url
Or you can just click on “Download” next to the file’s name.
You can also interact with public objects using a utility such as curl:
    # curl http://rdgw.kaizen.massopencloud.org/swift/v1/tutorial_container_unique
    test_file
    tutorial_pseudo-folder/
    tutorial_pseudo-folder/test_file2
To download a file:
# curl -o local_file.txt http://rdgw.kaizen.massopencloud.org/swift/v1/tutorial_container_unique/test_file
Make a container private
You can make a public container private by clicking the dropdown next to the container and clicking Make Private. This will deactivate the public URL of the container.
S3 Interface
The Ceph Object Gateway supports basic operations through the Amazon S3 interface. This enables compatibility with libraries and applications which have been developed to target the S3 interface.
To access this interface you must login through the OpenStack Dashboard and navigate to “Projects > API Access” where you can click on “Download OpenStack RC File” and select “EC2 Credentials.”
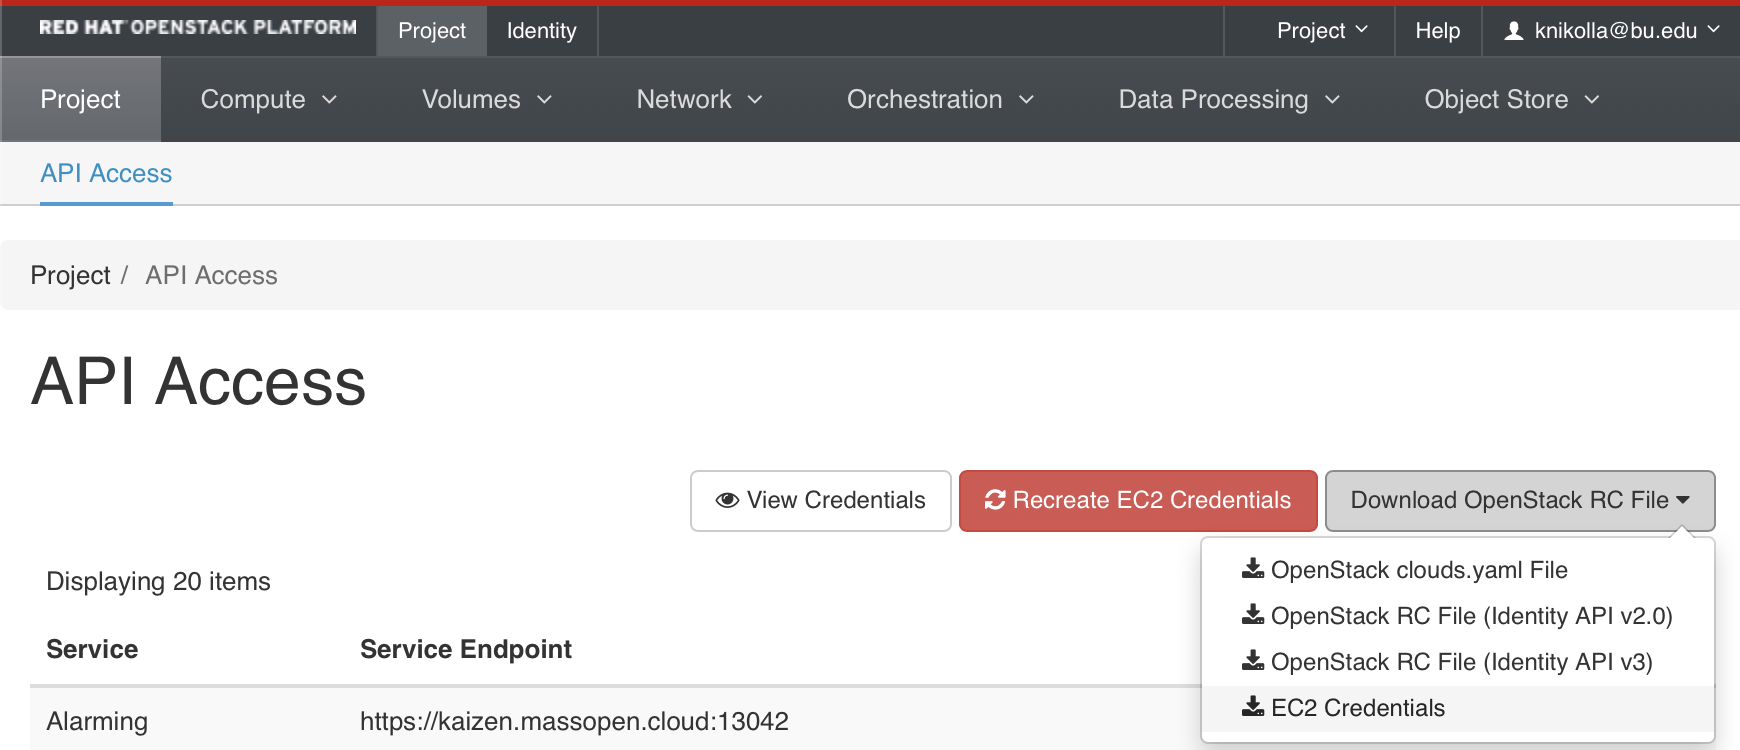
This will download a file similar to the one below. The important parts are EC2_ACCESS_KEY and EC2_SECRET_KEY.
    #!/bin/bash

    NOVARC=$(readlink -f "${BASH_SOURCE:-${0}}" 2>/dev/null) || NOVARC=$(python -c 'import os,sys; print os.path.abspath(os.path.realpath(sys.argv[1]))' "${BASH_SOURCE:-${0}}")
    NOVA_KEY_DIR=${NOVARC%/*}
    export EC2_ACCESS_KEY=25ff4004d5f64b0681e4e9ca87dcab4d
    export EC2_SECRET_KEY=db8cff9f059441bdbf8e190b356379fc
    export EC2_URL=https://kaizen.massopen.cloud:13788
    export EC2_USER_ID=42 # nova does not use user id, but bundling requires it
    export EC2_PRIVATE_KEY=${NOVA_KEY_DIR}/pk.pem
    export EC2_CERT=${NOVA_KEY_DIR}/cert.pem
    export NOVA_CERT=${NOVA_KEY_DIR}/cacert.pem
    export EUCALYPTUS_CERT=${NOVA_CERT} # euca-bundle-image seems to require this set

    alias ec2-bundle-image="ec2-bundle-image --cert ${EC2_CERT} --privatekey ${EC2_PRIVATE_KEY} --user 42 --ec2cert ${NOVA_CERT}"
    alias ec2-upload-bundle="ec2-upload-bundle -a ${EC2_ACCESS_KEY} -s ${EC2_SECRET_KEY} --url ${S3_URL} --ec2cert ${NOVA_CERT}"
The keys can then be plugged into your application. See below example using the Python boto library, which connects through the S3 API interface through EC2 credentials, and requests a listing of all the buckets that the user has access to.
    connection = boto.s3.connection.S3Connection(
        aws_access_key_id='25ff4004d5f64b0681e4e9ca87dcab4d',
        aws_secret_access_key='db8cff9f059441bdbf8e190b356379fc',
        port=443,
        host='kzn-swift.massopen.cloud',
        is_secure=True,
        calling_format=boto.s3.connection.OrdinaryCallingFormat())

    connection.get_all_buckets()
Swift Interface
There are a number of Swift clients available. In this tutorial we will use python-swiftclient.
# yum install python-swiftclient
If when trying to use the client, you get an error about ssl_match_hostname, you will need to manually install the relevant python backport:
# yum install python-backports.ssl_match_hostname
Swift authenticates using a user, tenant, and key, which map to your OpenStack username, project, and password.
Set these environmental variables using your openstackrc file, and type the command below to get a lits of your containers:
    $ swift -V 2 -A $OS_AUTH_URL -U $OS_TENANT_NAME:$OS_USERNAME -K $OS_PASSWORD list
    tutorial_container_unique
To upload a file to tutorial_container_unique
    $ swift -V 2 -A $OS_AUTH_URL -U $OS_TENANT_NAME:$OS_USERNAME -K $OS_PASSWORD upload tutorial-container_unique /path/to/file
    tutorial_container_unique
Type “man swift” to learn more about using the swift commands. The client has a –debug flag, which can be useful if you are having issues.